| ||||||||||||||||||||||||
|
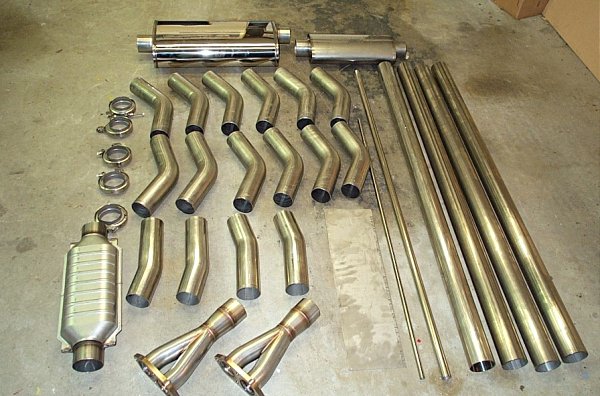
When one decides to build a custom exhaust it is necessary to choose between developing a crush bent
system, or a mandrel bent system. Most people would assume that a mandrel bent system must be better
but this is not always the case. The mandrel bent system must be welded together out of many pieces
of tubing which have been pre-bent to specific angles using a mandrel. Every joint in the system is
a possible problem spot if the tubes are not joined evenly as this leads to steps in the inner wall that
can cause flow restrictions. Weld penetration at the joints can also lead to a reduction in the cross-
sectional area available for flow. This is especially the case if the welder does not back-purge the
inside of the tubing with Argon during welding.
A crush bend can flow just about as well as a mandrel bend up to about 30�. That is, if the crush bend is well performed. A lot of it depends on the fabricator. The nice thing about crush bends is that they allow one to use much longer contiguous pieces of tubing in the exhaust - the number of joints can be reduced. This makes things simpler and often cheaper. But it's tough to find someone who can produce a good quality crush bend. It's for that reason that I went with a 100% mandrel bend system. I would have liked to have used a few crush bends in the lower angle turns, but I could not find anyone whom I trusted to do it properly. The two places I know of to get pre-bent mandrel sections in stainless steel are Burns and SPD. I went with Burns as they were closer and they actually have a pretty good website. I chose to go with 304 stainless, which is not as good as 321, but it's a heck of a lot cheaper. And as long as your not dealing with super high temps (like a header) then 304 is fine. I went with the heavier 0.065" wall size as opposed to 0.049" in order to gain some margin against damaging the exhaust over speed bumps or during an unplanned agricultural trip. But one could save some weight going with 0.049" tubing (roughly 25% lighter). Why a 3 inch diameter? Well, the stock 2.3L dual 45 mm setup offers 4.29 in� of cross-sectional flow area whereas the single 3 inch system provides 6.51 in� of cross-sectional area. That's a 52% increase in flow area, which seems reasonable compared to the approximate 35% increase in power I have over a stock 2.3L S14. Note that these areas are based on inside tube diameter. The nominal thickness for the factory exhaust system (as well as the header) is 1.5 mm. This is equal to 0.060" which is not far off the 0.065" thick tubing that I used. To be strictly correct, one should subtract the thickness of the tubing when calculating cross-sectional area from tubing OD. In all honesty, the real reason I chose a 3" system is that I had seen and heard of several high HP S14's which employed 3" systems with great success. I know that's not very scientific, but why re-invent the wheel right? Here is a table showing the different cross-sectional areas that are obtained with certain popular S14 custom exhaust systems. A 1.5 mm tube thickness is assumed in all cases: | ||||||||||||||||||||||||
| ||||||||||||||||||||||||
|
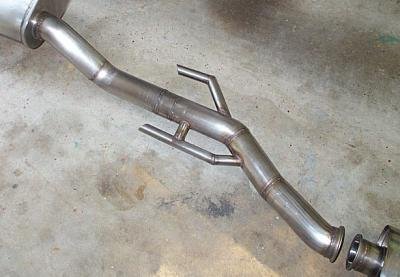
I did not squish the exhaust tubing where it passes under the rear subframe (in an effort to try and gain more ground clearance). And I do not regret that decision. Sure I have to be careful driving over speed bumps and such, as the tubing does hang down pretty low at that point. But with my stiff suspension I drive slow over obstacles anyway. Interestingly, the following photo of a Gr A exhaust shows that BMW did crush the tubing where it passes under the rear subframe. But this was very big tubing - maybe 3.5" diameter or more. And the car was probably very low as well. So ground clearance may have become an issue. | ||||||||||||||||||||||||
| ||||||||||||||||||||||||
|
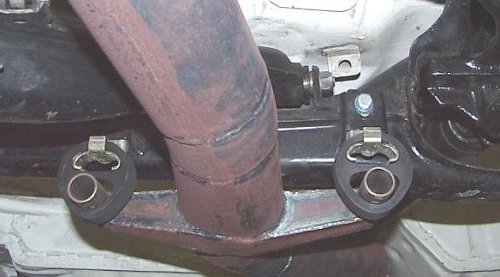
Below is a photo detailing the exhaust hangers under the rear subframe. I used 1.125" stainless tubing which slips right into the stock rubber exhaust hanger donuts. This 1.125" tubing turned out to be very expensive. I might use 1" tubing if I had to do it again. Although my hanger arrangement turned out ok and works just fine, I rather prefer the way it was done on the Gr A exhaust shown just above. | ||||||||||||||||||||||||
| ||||||||||||||||||||||||
|
Page 4 » | ||||||||||||||||||||||||
|
|