|
|
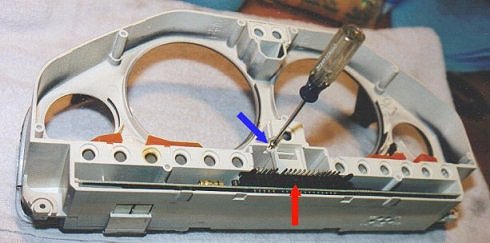 |
| We now return our attention to the front of the instrument cluster (the clear plastic face). You can see the previously mentioned prongs on the back of the SI board (red arrow). The blue arrow highlights the single Philips screw which must be removed in order to pull the SI board free from the cluster face. The Philips screw holds down a small plastic bracket. Once the screw is removed, pull out the plastic bracket and then gently pull out the SI board. It must be pulled straight out. If it rocks sideways it will get jammed. On the left side of the SI board in this view there is a small electrical prong connector where the board plugs into the cluster face. This will automatically be disconnected as you pull out the board. |