|
|
|
|
|
|
|
|
|
S14/S38 Valve Adjustment |
|
|
Procedure w/ pictures |
| This valve adjustment procedure comes to us via fellow E30 M3 owners Jim Banks and Bob Talbot. All photos are by Jim Banks. |
|
|
|
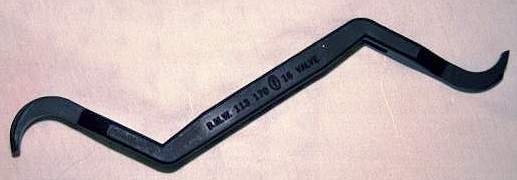
Tools/Supplies needed:
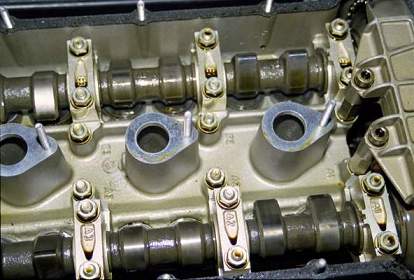
Procedure: 1. Let car sit overnight so the engine is COLD 2. Take car out of gear and secure with tire chocks and parking brake. 3. Remove fan or lower airbox assembly (picture 2) so you can put a 36mm socket on the crank bolt for engine rotation. 4. Remove valve cover vent hose above #4 (rear) cylinder. 5. Remove three (3) 8 mm bolts and wave washers securing distributor cover to distributor (be careful, these bolts are very short) and leave distributor cover loose (it is not necessary to remove the cover completely). Remove two 10 mm acorn nuts and wave washers securing spark plug harness to valve cover (be careful not to lose the knurled brass inserts). Pull spark plug wires off plugs and carefully pull harness out of way. 6. Remove eighteen (18) 10 mm acorn nuts and wave washers that secure valve cover. 7. Remove valve cover, valve cover gasket and spark plug hole gaskets. 8. Remove spark plugs if you want to ease engine rotation. Note: be VERY careful that nothing (e.g., washers, sockets, dirt) drops into the open cylinders through the spark plug holes! 9. You should now see the exposed cams (intake on top, exhaust on bottom),
as well as the shim and bucket valve actuation mechanism (picture 3). You
will notice some pooling of oil around the exhaust buckets at the bottom
of the engine. This is normal and doesn't affect the valve adjustment procedure
(except to make it a little messy). Remove the oil if desired with a turkey
baster, vacuum device or rags if desired - but remember to check and top
off your oil after completing the valve adjustment procedure.
|
|
|
|
|
|
|
|
|
|
|